
The iPhone has one of the best camera systems on the market. Now if you have probably taken it with you everywhere and you probably take pictures. So, here’s a few tips on how to take better photos with your iPhone.
Rule of Thirds

Now first up doesn’t really apply just to the iPhone it works with pretty much every camera and that’s composition. So first up is the rule of thirds this is one of the more important composition rules and it’s a pretty easy one to implement. Because your iPhone actually has a tool built right in so if you go into settings then you go to the camera then you turn on grid and then you go back to the camera app. You’ll now see that there’s a grid on your screen sousing the rule of thirds is simple the idea is that instead of putting your subject right in the middle of the frame all the time. Which you might do try moving the subject to one side of the frame or the other the grid on the screen. You just turned on it helps you guide where to put things if you look at where those lines intersect and you put your subject there that’s using the rule of thirds. This gives the image much more interest and pull you into the photo. It makes it more than just a snapshot.
Don’t Use Zoom

Now another tip is to move around the iPhone only has one lens and the digital zoom is horrible. So, you shouldn’t use that but instead what you should do is move to your subject. It’s very easy to just stand in one place and try to get the picture but that won’t always produce the result you want. So, if something’s far away trying to move closer and if it’s higher up try to get higher. This is the easiest way to not only get better photos but become a better photographer at the same time. It will teach you how to compose your shot.
Panorama Mode
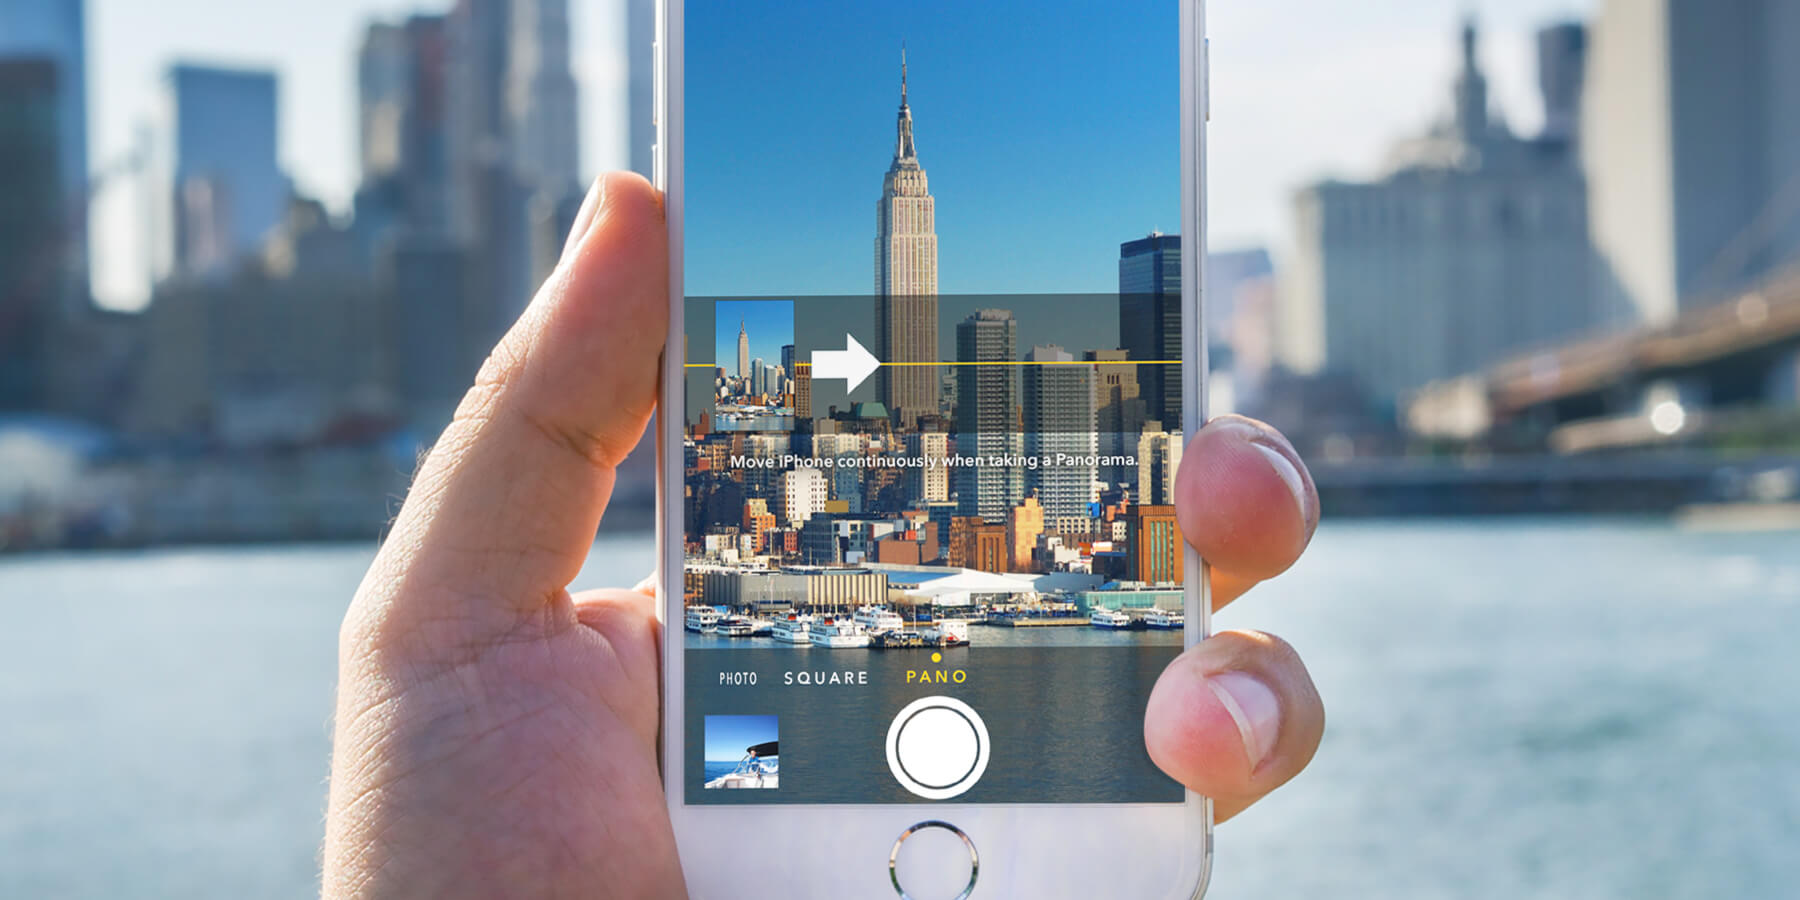
Now if you’ve moved already and set up your shot. The way you want but you just can’t quite get everything in frame try using the panorama mode. You don’t have to sweep all the way across but just doing it a little bit to fit everything in frame. It will make sure that you get the shot you want.
Now besides those basic photography composition tips. There are tools built right into the camera app that let you get the most out of your iPhone.
HDR
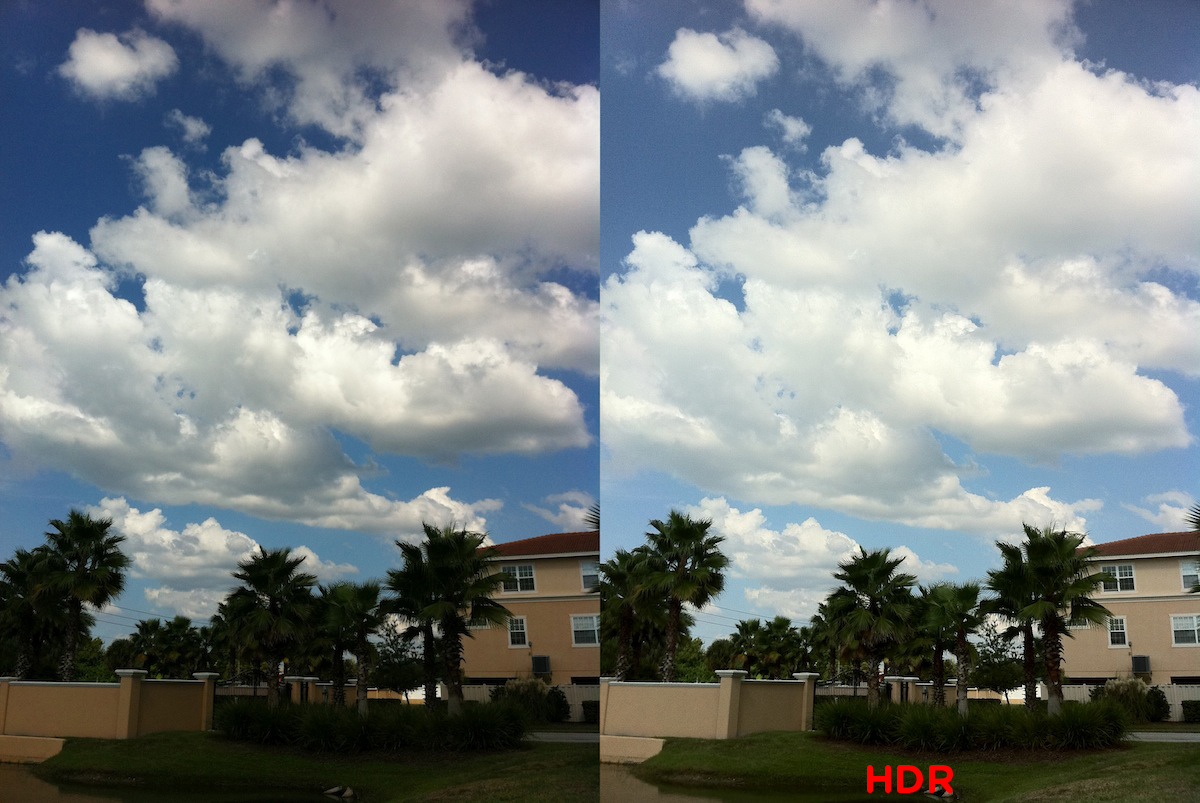
So first off use HDR turning it on Auto will make sure that HDR will be used if needed what this does is allow the really bright spots in a picture like the sky and the really dark spots like shadows. It allows them to have more detail a normal picture will kind of average everything in the shot into one brightness but HDR combines multiple exposures. So basically, takes multiple pictures and mix them into one image and that allows you to have much more detail all throughout the picture. So, putting it on auto will give you that advantage when you need it.
Tap to Focus

Another tip is tap to focus so yellow box that pops up on your screen when you’re taking a picture is actually the most powerful tool in the app. This allows you to tap anywhere on the screen and have that part both be in focus and be properly exposed. So, for instance if you have a subject that is really bright and close-up and you want to make sure that it looks good. If you tap on it that yellow box will appear around it will set the focus and expose itself based on where you tap. So now that really bright and close image will be sharp and it won’t be too bright or too dark. Now this works pretty well most of the time but sometimes the image can still look too dark or too bright. You can fix this too if you tap and dragon the screen, you’ll be able to change the exposure. You can go up for brighter and down for darker and this will let you dial in exactly how bright or how dark you want the image to be and also with this yellow box if you have everything set the way you want and you don’t want. It to change no matter what if you hold down on it will lock itself and make sure that nothing changes overall. This feature will give you the most control over everything in your picture and is the most important one to remember. When looking to get better photos.
Don’t Use Flash
Now finally after all these tips the last one is to turn off your flash for about 99 percent of the time that you want to take a photo. The flash is only going to make it worse using the tips mentioned will help you get that nicer brighter image without using the flash. Now if it’s really dark outside or wherever you are and that’s the only way to get the image then okay turn it on but other than that try to limit the flash to when you’re looking for something you’ve dropped.
So those are some tips on how to take better photos with just your iPhone. These will help you get the most consistent photos that look great and it will give you a great starting off point that you can learn and grow from. So, let us know down below with a comment if you have any tips for taking better pictures with your iPhone and if you have a favorite shot that you’ve taken.